


I am working on my sister's wedding invitations, today i am doing the envelopes. Now, i want the wording to be lined up perfectly on these.
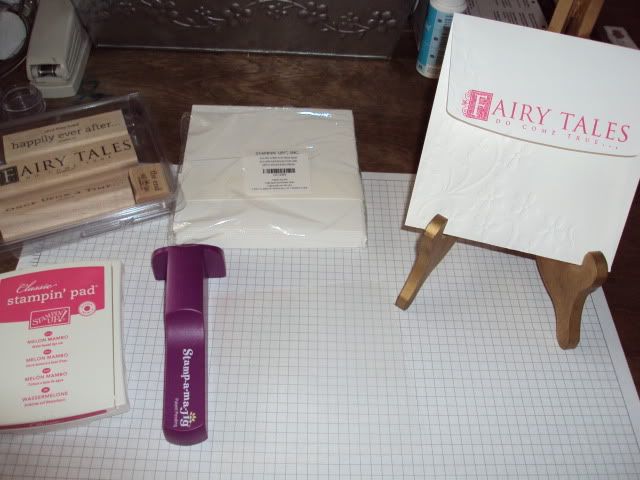
Here is what i used: The envelopes are SU's 5x5 whisper white. The stamp set is "Once Upon A Time" #113746 (19.95). And i am using Melon Mambo ink.
My sister's wedding colors are Pink (like Melon Mambo), Black and White.. And she is having a "Disney Fairy Tale Wedding" - she is getting married at the Grand Floridian at Disney's wedding pavilion in March 2010. I am SOOOO EXCITED!! Ok, back to the tutorial..
First, you will notice that the Stamp A MA Jig has a clear plexi piece that goes with it -- you need to flip it over to have the rough side facing you.. then line it up to the bottom edge corner as shown of the SAMJ .
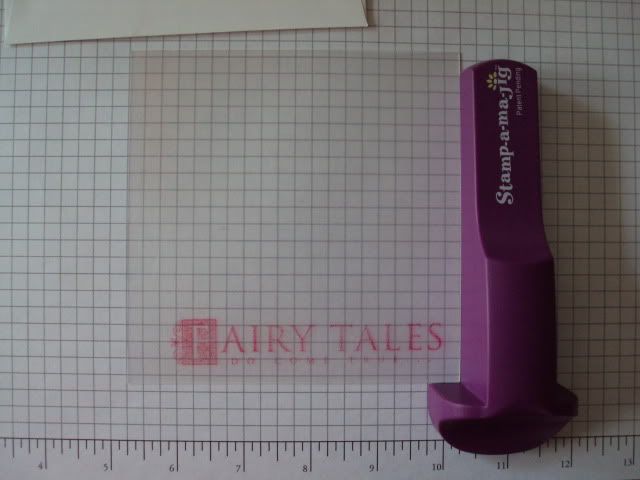
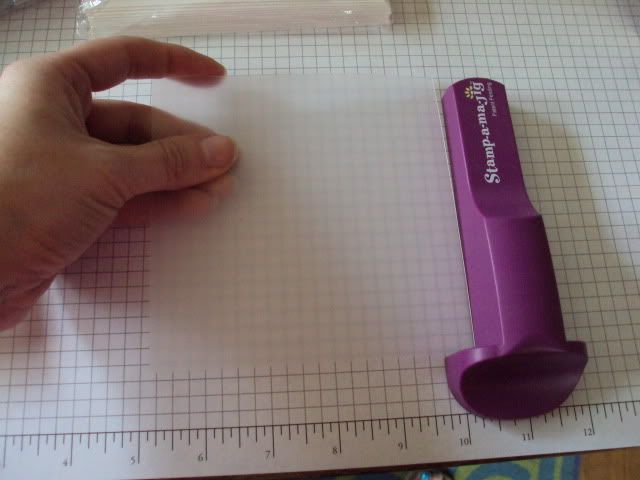 Next, you will stamp your image (with your ink) on the rough side of the plexi-plastic stuff... (see below)
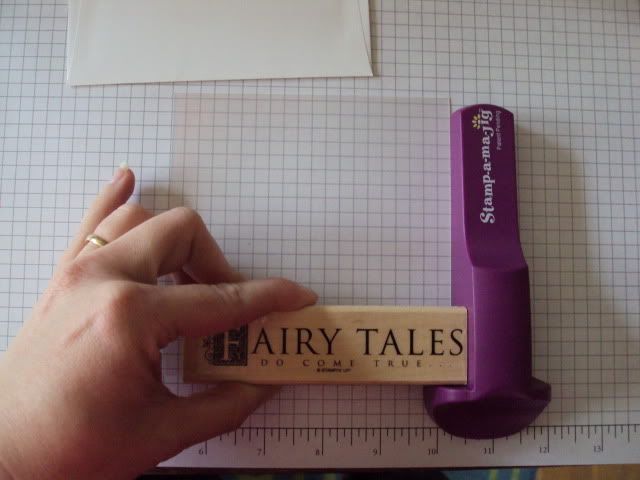
This is your guide.. so take that plastic piece, and put it exactly where you want it to go on your envelope.. Then, line up your SAMJ . (to the corner - same as how you stamped)
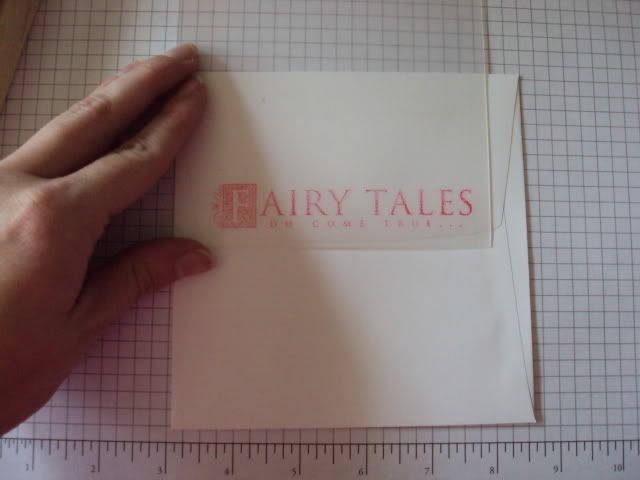
Now, remove the plastic, and KEEP THE SAMJ WHERE IT IS!!! While it is still in position, line your stamp up to where you took the plastic from , and when you have it set - remove your SAMJ.
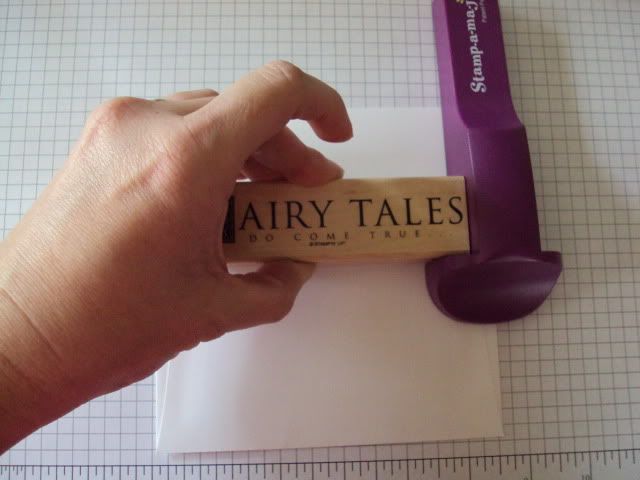
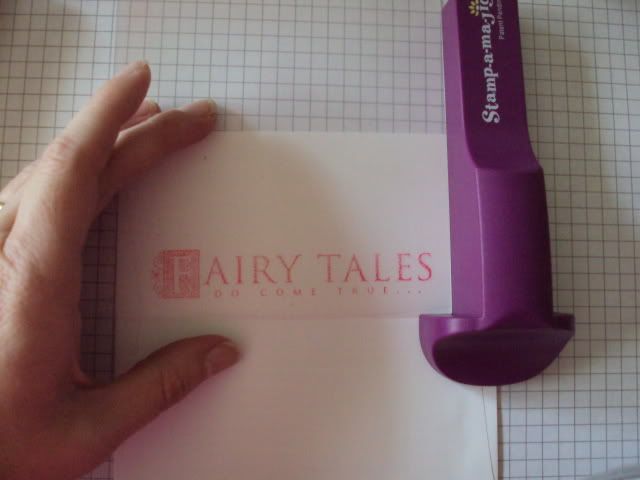
And STAMP! :)
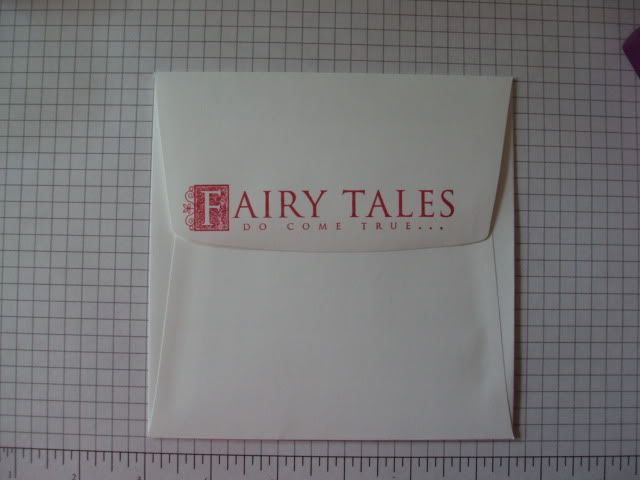
There you have it!!!! IT's a wonderful tool!!
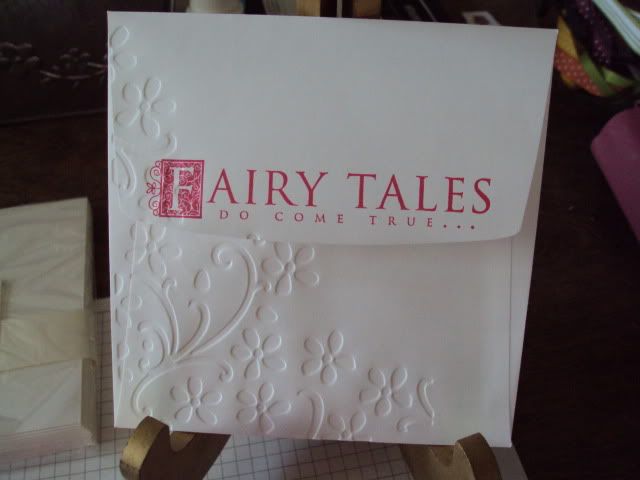
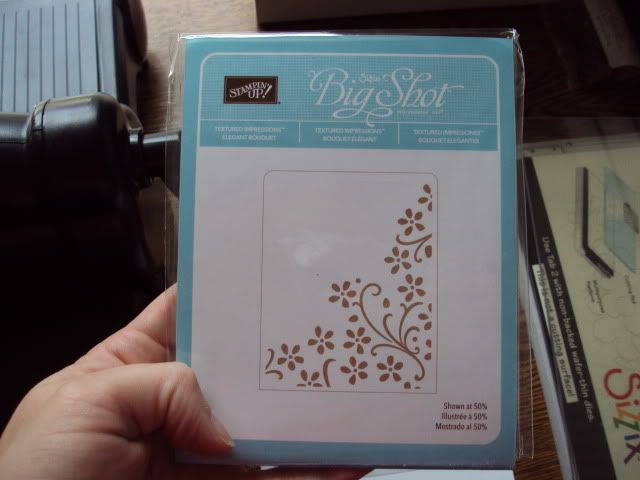
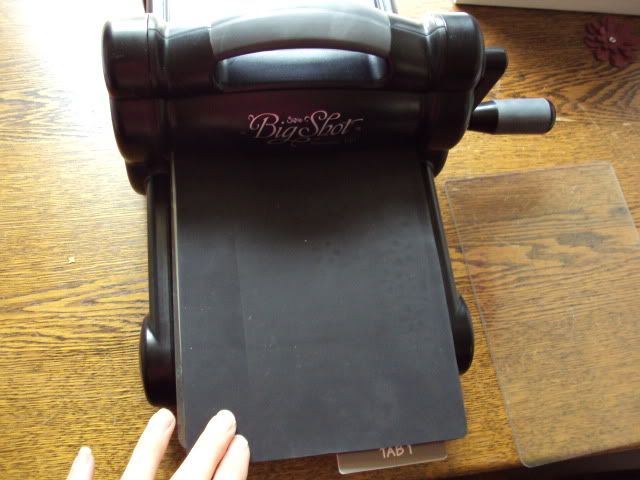
Now, to finish my envelope, i am going to show you how i embossed it. I got my new toy in yesterday - the Sizzix bigshot! I love it!!!
So, i used the SU Elegant Bouquet folder, you just follow the directions, with layering it into the machine, and run it thru...


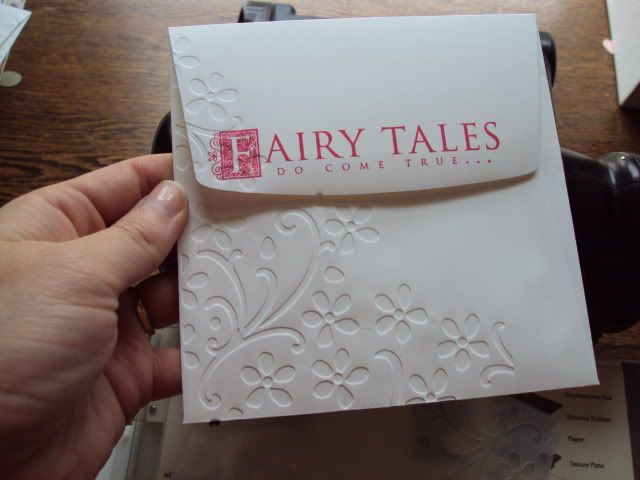 And there we have it!!!! A pretty (if i do say so!) embossed wedding envelope!!
~Stacy


I just tried to post a comment and it disappeared! Oh well ; ) Great tutorial - I love the embossed envelope...I hadn't thought of that! Now I can't wait to try it.
ReplyDeleteCongrats on your new toy too!
Yep, ever since Angela showed me the Stamp a ma jig at convention last year, I have been a faithful user!
ReplyDeleteBeautiful envelope!
Great job on the tutorial. The envelope is too cute.
ReplyDeleteGreat idea embossing the envelope, I hadn't thought of that and that folder is perfect to do it.
ReplyDelete